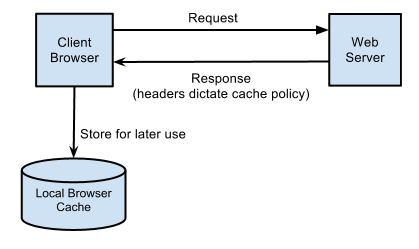
Caching is a great concept in network bandwidth and network speed optimization. It is used in almost every component of the web industry. We can see cache in the database layer where we can store the frequent query. We can see cache in the backend web server like Nginx or Apache to optimize the assets delivery. And of course, we can never forget the client/browser cache, which we gonna focus on today.
Basically, in order to optimize the webpage load speed, the browser will try to cache every detail of that website (DNS, HTML, js ,css files ,..). As a result, the next time user enters the page, the speed will be improved as many parts of the website just be taken directly from the cache browser.

However, the problem arises when we try to release a new version to our website. There are some changes we want to apply, maybe the color of the text, maybe the function of some buttons. This is where the ugly side of caching appears. Because the browser always loads the page from cache first, as a result, our clients still seeing the old version. That is why we need some cache handling to avoid this situation happens.
Hashing files
One of the best ways to handling all of your web assets is to hash the name of the files. Especially, if we are using Webpack. So the idea is every time we release the new version, the server will compile files with different names than old versions. As a result, when the browser tries to request the old file name, it will realize that it is not valid anymore, and will start to pull the new files. And of course, if we are using chunk and code splitting, we need to hash them too. This is an example when using webpack in vue cli.
module.exports = {
 configureWebpack: {
  output: {
   filename: "[name].[hash].bundle.js",
   chunkFilename: "[name].[hash].js"
  }
 }
}
Cache-control in HTML
However, usually, the HTML file is not hash. Therefore, if the browser chooses to load the old HTML files, it will still point to the old js files. To deal with HTML files, we can set some cache-control tags to let browser know.
<meta http-equiv="cache-control" content="no-cache" />
<meta http-equiv="pragma" content="no-cache" />
If we want to have more complicated control on cache, some other settings can be used like max-age, last-modified, … What they are and how to use them can easily be looked up on the Internet.
However, one funny thing I want to have a quick mention is this 3 cache-control: no-store, no-cache, must-revalidate. Their definition can be searched online, for example here. So in short:
no-store: means not using cache at all, in any situation.
no-cache: browser can store cache, but it always needs to revalidate with the server before using it.
must-revalidate: quite the same with no-cache, but the revalidation process will be triggered after the cache expires, whereas, in no-cache it is immediately.
So, the convention keyword “no-store” here actually means no-cache. And the convention keyword “no-cache” here actually means must-revalidate.
Notes: One important thing to note about meta tag: In the case, there is a proxy server sitting in the middle, maybe like Nginx. It has the power to overwrite these tags. Therefore, if after settings the cache-control in HTML, but still there is no change, have a look at your Nginx settings.
Backend Communications
This can be used as an even stricter way, by communicating with backend. The idea is in the backend, we will store what is the version of the website. We can also store some assets version here. Then, when the page load in the frontend, we make a call to the backend to validate the versions. If the client version is outdated, we will trigger a full reload in the frontend by javascript. However, this is a bit reinventing the wheels, and should only be used when our product needs further restriction in security.

No responses yet